There are a number of ways Variant Stock Items can be added to the sale, either by scanning the Stock Item's barcode, or by pressing a POS Screen button.
The behaviour at the POS Screen may also vary depending on a number of factors as outlined below:
For this type of environment, assign the barcode to the parent item.
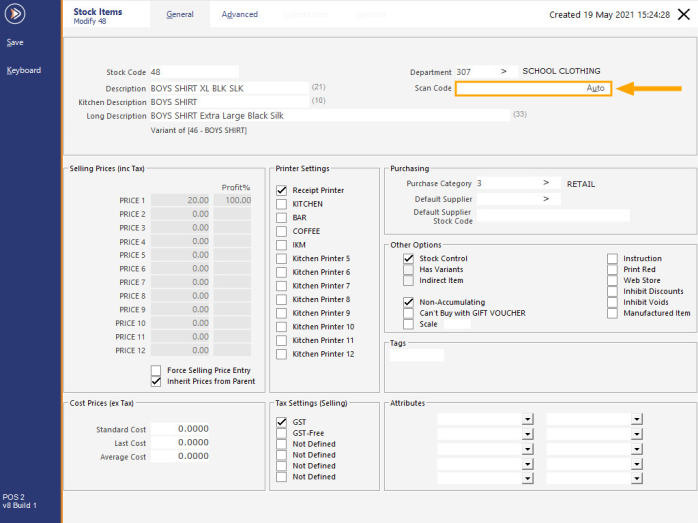
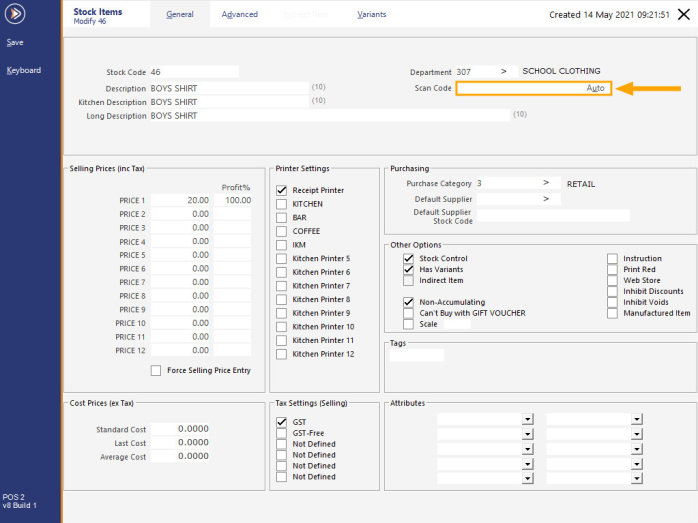
From the Stock Items screen, open the main item/parent item.
Enter the barcode into the Scan Code field and save the change
Ensure that the child items do not contain a barcode.
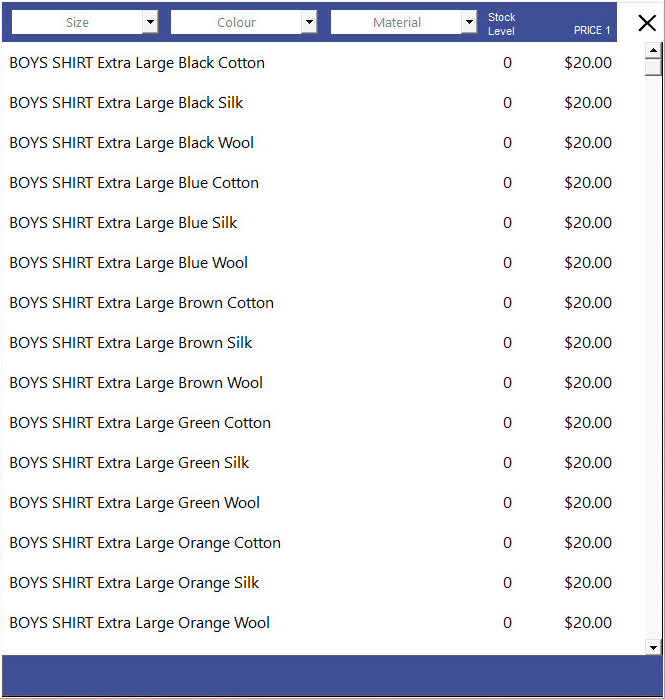
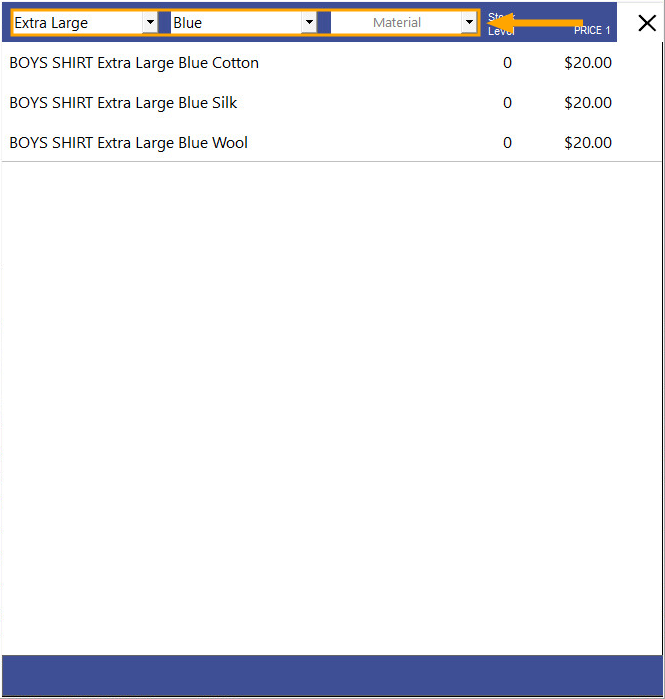
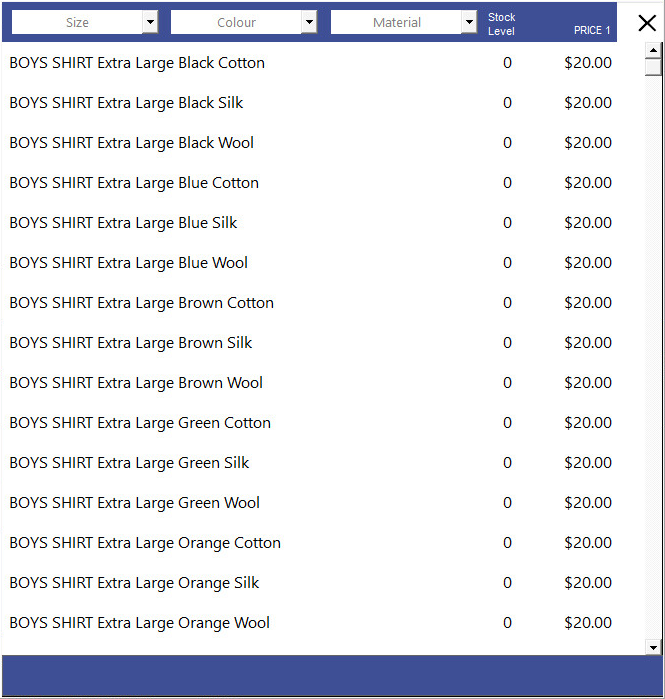
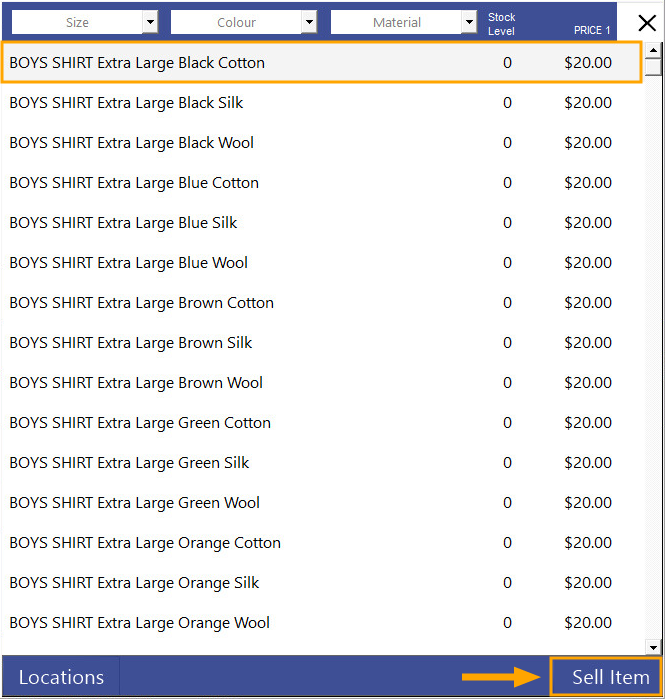
When the Item is scanned at the POS Screen, Idealpos will display a window with a list showing all the available variations of the item.
The Stock Level shown in this grid represents the Stock Level for the current location (i.e. the location in which the POS terminal is located).
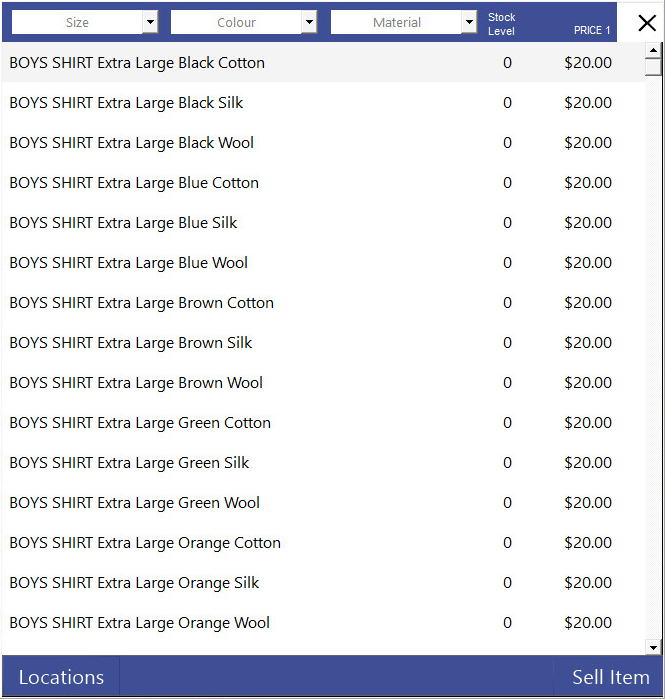
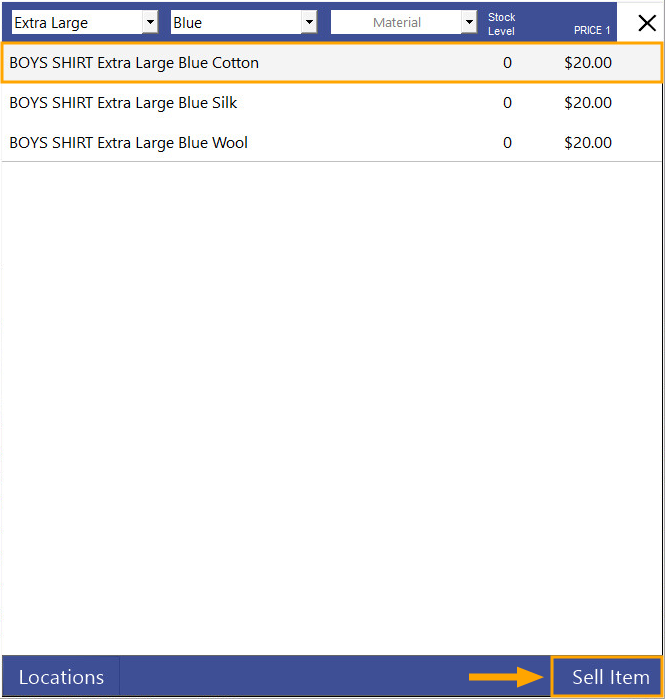
After the Clerk selects an item from the list, additional options will appear at the bottom of the window:
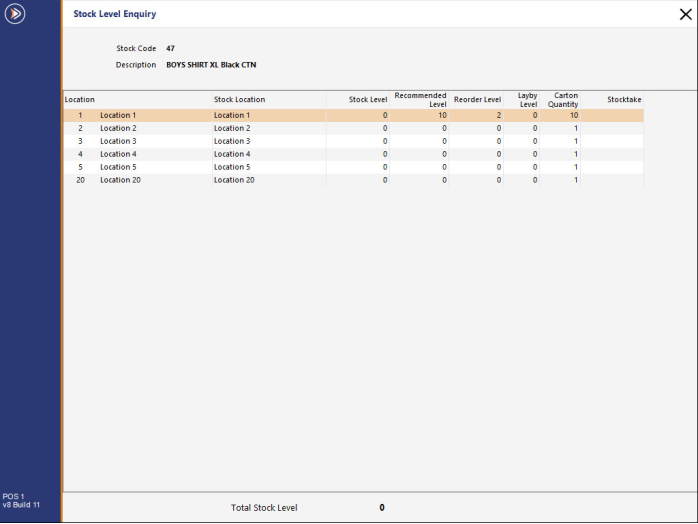
Locations - This button displays a Stock Level Enquiry window which shows the locations where the item exists and the Stock Level available in those locations.
Sell Item - This button adds the currently selected Variant Stock Item to the sale.
The below is an example of the Locations window:
If there are a large number of available variations of the item, the Clerk can filter the list by selecting one of the Variant options from the Variant dropdown boxes at the top of the window.
Select an item from the list and press the "Sell Item" button on the bottom-right corner of the window.
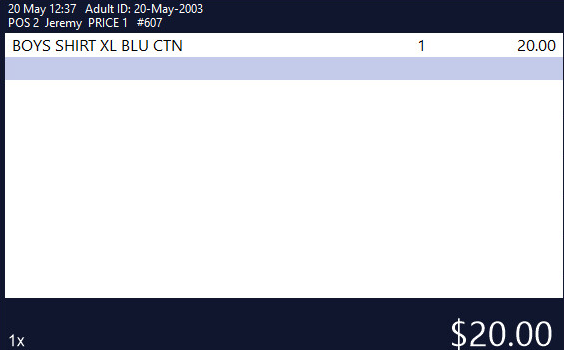
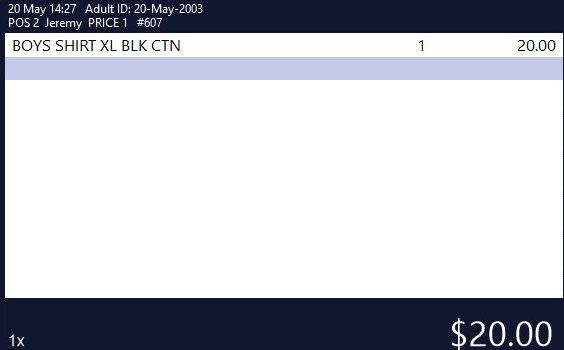
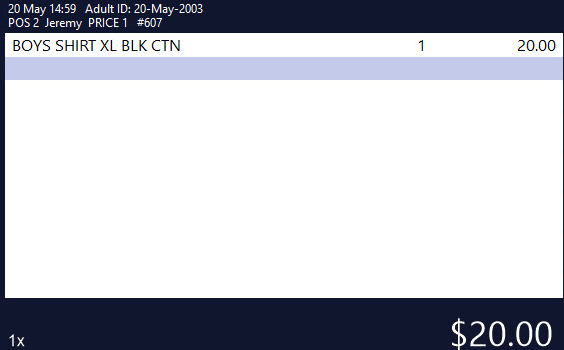
The item is added to the sale.
If the customer is buying more than one quantity of a specific Variant of an item, the Clerk can enter the Quantity, press the "X" (multiplication) button, then scan the item.
Idealpos will still display the same screen showing the list of available Variants, but when the Clerk adds the item to the sale, it will be added using the quantity that is entered.
Alternatively, the quantity can also be entered after the item has been added to the sale by simply selecting it from the sale screen, pressing the "X" (multiplication) button, then entering the quantity and pressing the Enter button.
The quantity will be updated using the entered number.
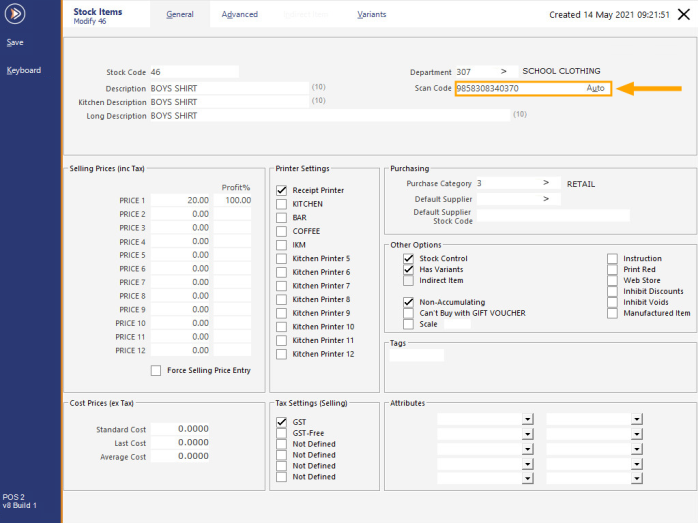
For this type of environment, the barcode that's printed on the each Variant Stock Item should be assigned to the corresponding Variant Stock Item that has been created in Idealpos.
The parent Variant Item will have a blank barcode.
The below example shows the parent Stock Item with a blank Scan Code:
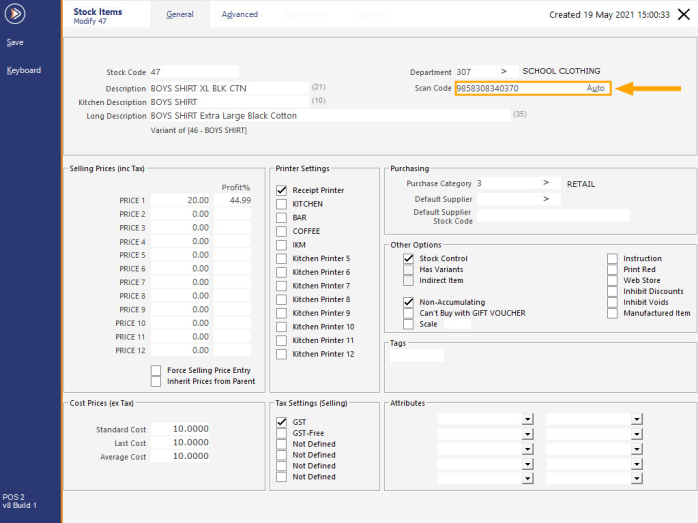
The below example shows the child Stock Item with the Scan Code populated with the Item's Scan Code:
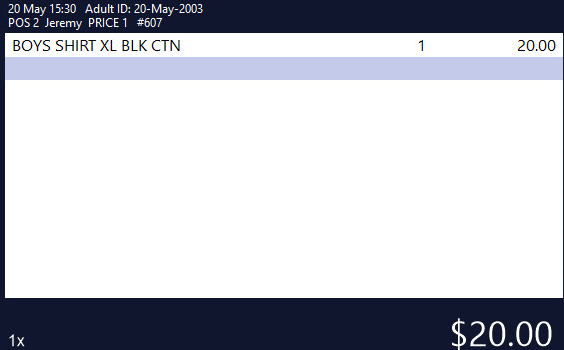
When the Stock Item is scanned at the POS Screen, the item is added to the sale without any additional input from the clerk.
Should the customer be purchasing multiple quantities of the same item, the Clerk can either scan each item individually, or they can enter the quantity using the on-screen numeric keypad, then press the "X" (multiplication) button and finally scan the Stock Item Barcode.
The quantity that was entered will be added to the sale.
The method of adding a Variant Stock Item to the sale via a POS Screen Button can be used if the Variant Stock Items either do or don't have barcodes printed on them.
Using a button that's linked to the Parent Item will save on POS Screen button real-estate.
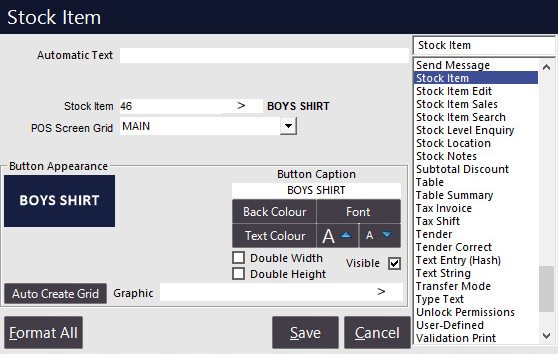
You can have a single button on the screen which when pressed, will display all the variants of an item that are available.
Create a button via Setup > POS Screen > POS Screen Setup > Select POS Screen Layout > Buttons
Find an unused blank button on a suitable POS Screen tab where you want the button to be created, then click on it.
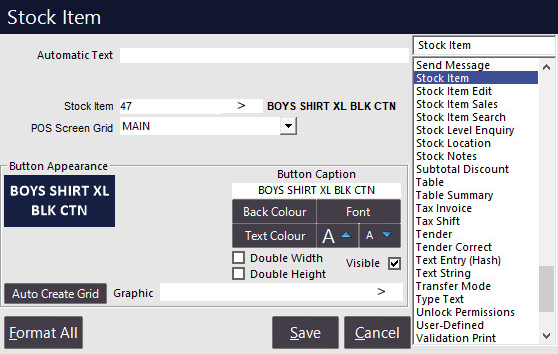
Configure the button as follows, ensuring that you link the button to the Parent Stock Item.
Save the button, then close the POS Screen layout windows.
When the button is pressed, a list of Variant Stock Items will be displayed.
Once the Clerk selects an item from the list, the Locations and Sell Item buttons will be displayed at the bottom of the window.
Pressing the "Sell Item" button will add the item to the sale.
The variant item is added to the sale.
The method of adding a Variant Stock Item to the sale via a POS Screen Button can be used if the Variant Stock Items either do or don't have barcodes printed on them.
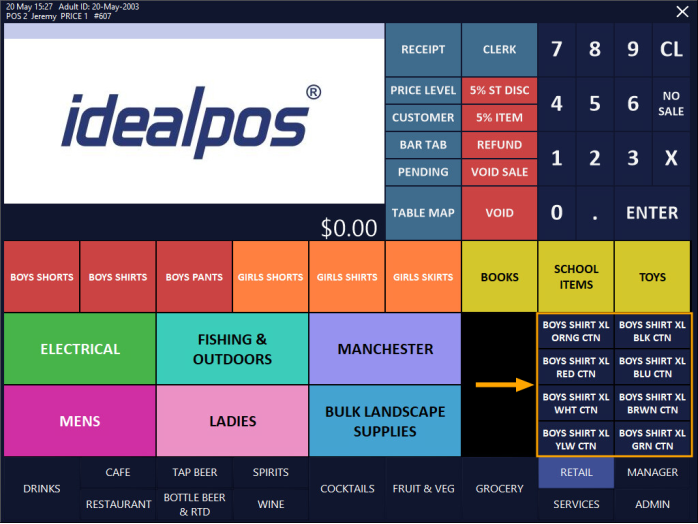
Using a button that's linked to the Child Item will require the creation of a button for each Variant Stock Item that you want to be able to sell via a button on the POS screen.
If you are selling an item which has a lot of variants available, taking this option will be at the expense of POS screen real-estate as you will require a button on the screen for each type of variant available (or at least, the most popular variants).
Create a button via Setup > POS Screen > POS Screen Setup > Select POS Screen Layout > Buttons
Find an unused blank button on a suitable POS Screen tab where you want the buttons to be created.
Ensure that you have enough blank buttons available for each type of variant you want to have on the screen.
Click on the first blank button and link it to the first variant type:
Repeat the above process for each variant type that is required on the POS Screen.
Once completed, close the POS Screen Layout windows.
From the POS Screen, navigate to the tab where the POS Screen buttons were created for the variant items and press the item's button to sell that particular variant type.
The item is added to the sale.